Saturday, January 8, 2011

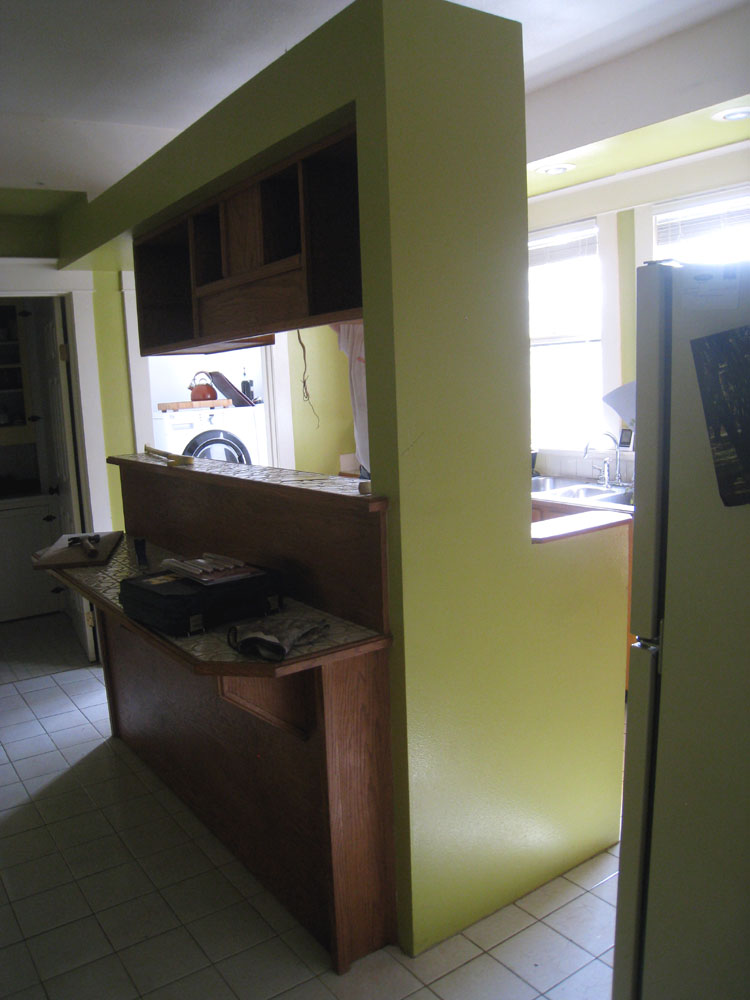
Be Green. We support that. Just not on our kitchen walls...

The day finally came to paint over the green walls!


Here's an after photo of the final painted walls. We used the same dark blue color that we painted the pantry (check it out here).

And while we didn't cut corners on appliances and countertops, we just didn't have it in the budget for new cabinets. Luckily, the existing cabinets were in great shape and the plan was to paint them white. So while we were priming over the green walls we primed over the cabinets as well. What a difference already...


In every demolition an ax must swing

After we removed the top portion of the kitchen's partition wall earlier this year, the base of the wall was left. Here's what it looked like:

And (of course) the wall was built to withstand a tornado and was not coming out without a flight. Here's David preparing to wage war against it.

After the partition base came down, David dismantled the island and prepared it to be reconfigured and rebuilt.

A Ghost of Kitchen's Past

The kitchen has been remodeled. It's done. Finito! But I am getting ahead of myself, let me start at the beginning...

They say the kitchen is what sells a house. Whoever 'they' are, 'they' do not speak for us because we bought this home despite the kitchen. From day one we couldn't wait to tear it down and build it back up. Here is what we started with:


As you can see, everything MUST go! Earlier this year we'd had enough of the partition (complete with cabinetry) that cut the kitchen in half. So we got out the power tools and took it down! The kitchen instantly felt twice as big. It was a good start, but we had a looooong way to go. Here's a few play-by-play photos of the partition coming down  (you can click here for the full post).


A Pregnant Pause

Yes, there have been a serious lack of posts lately. No, the house projects have not slowed down (in fact they sped up!). This recent blog neglect was for a very good reason. On November 24th we welcomed our son, Aiden James, into the world! We're certain he'll be a natural at home improvement when he gets a little older. Until then, Aiden gets VERY sad when we tell him he's too little to run the power tools...
For those who are interested, I started another blog for posting photos of Aiden and our family. Click here to check it out. I plan to keep this blog strictly about the house and to resume posting very soon! In fact, I have so many updates, upgrades and transformations to post I don't know where to start. Happy New Year to all you in blog world!

Monday, November 8, 2010

Painting Progress: Prettying up the Pantry

Next in line for a fresh coast of paint after the dining room was the pantry.

I wanted the kitchen and pantry to be the same color in an effort to help tie the two spaces together. Inspired by the Pottery Barn room seen here, I got a sample of Benjamin Moore's Newburyport Blue. After painting a test patch of color on the walls, I immediately fell in love!

Here's a look at the pantry before (so long yellow doors and linoleum!):

A while back we replaced the old, plain fixture with a lamp-post inspired pendant I picked up at an antique shop (click here for that post) .

And here's a look at the repainted, revamped pantry:
 

Sunday, November 7, 2010

We are FLOORED - Part II

Last Spring we had the original fir floors upstairs refinished (click here for that post) and always planned to have the main level floors refinished this year. After painting all the rooms on the main level, it was finally go-time for the floors.

Under tiles (many cracked), linoleum and layers of paint we found beautiful, original fir floors throughout the main level. There were a few old, improper patches that had to be addressed and patch correctly with fir. What would a home improvement project be without a few surprises?

Here's a look at the transformation:
Dining Room - Fir floor restoration
Kitchen - Fir floors under tile
Kitchen - Fir floors under tile, Old patch had to be repaired


Old patch in the kitchen...like it never happened!
Pantry -Fir floors under linoleum
Staircase to side door and basement - Fir floors under layer of paint
Entryway - Fir floors under tile
Entryway - Fir floors under file

Privacy Please!

One of the first items on our to-do list upon buying this house was to add a privacy hedge along the North and East side of the property. But as timing, weather and the seasons would have it, the hedge didn't go in until recently. We opted for well-established English Laurel bushes and found a supplier out of Canby, OR that had amazingly low prices (although it did take almost three months to fulfill our order). We bought 27 4-6 ft Laurel bushes but in order to fill our large order with same-size plants, the company gave us 6-8 ft Laurel instead. We certainly can't complain about that! Here's the first few bushes as they arrived:

Our handy man, Enrique, got to work and after two days of digging the 27 bushes were in the ground. The hedge instantly gave us more privacy in the yard and became a much-needed separation from the sidewalk and street. Within a few short years we should have a very solid hedge that reaches 10-12 feet high. David has already put his hedge trimmer to work sheering up the sides of the bushes and we'll let the top growth aim for the sky until next year's trim.

Here's a few shots of the new hedge:
 

Here are a few before-and-after comparisons to the property as it looked when we first bought it:


To complete our quest for privacy in the back yard, we extended the existing fence out to the property line. After a year or two of weather exposure the new section should look just like the existing portion.

Wednesday, September 8, 2010

Painting Progress: Dining Room Complete

We've been painting like mad over the past few weeks and have made some major progress. The latest room to be transformed is the dining room. The red walls and gold metallic ceilings were begging us to paint over them since the day we bought the house. The ceilings are now white and the walls are a rich, flat-finish tan. The beautiful wainscoting and box beam woodwork were painted glossy black at some point in the past and we decided to keep the black (anything else would have been SO much more work!). In the end I'm so glad we did--the glossy finish of the black reflects the lighter wall and ceiling colors and doesn't feel as dark as it originally did.

We also swapped out the old (read 70's gaudy and tacky) chandelier for the new model we purchased a while back. When the new chandelier arrived we were surprised to see it was quite a bit more red than was advertised. But over the past few months the red grew on us and now I absolutely love the unexpected, rich pop of color it gives to the room.

Here's what the dining room looks like now:

Here's what we started with:

Before and after shots: