At long last, today they finally poured the garage floor, driveway, stairs and walkway. Now they just have the sidewalk patch, approach and curb to go (well, and touch up and sealing, of course).
We're THRILLED with the results. The exposed aggregate concrete ties in to the house and existing wall just as we imagined. And it's so great to see the project take such a big leap forward toward the vision that's been in our heads for months.
I can't wait until it's sealed and done, but sadly, after the seal is on we'll have to wait another two weeks for additional cure time before we can drive on it. Wait wait wait wait wait. My birthday is in two weeks, so maybe my birthday present will be off-street parking, at last!!
For those not familiar, exposed aggregate is as easy as 1-2-3:
1. Form and pour.
2. Lightly spray the concrete with a retarder solution, which is essentially sugar water. The retarder will slow the setting of the very top surface layer, allowing the underlying concrete to harden while the exterior layer remains soft.
3. The difficult part... When the concrete has become hard enough to carry a worker's weight without messing up the aggregate, the surface is washed with a hose and scrubbed with a broom to remove the top layer of retarded cement. This requires a bit of technique and finesse, as care must be taken to not displace the aggregate or expose it too deeply (leading the aggregate to lose it's bond, letting stones pop out and generally messing up your finished look).
Here's a video showing the progress and the crew working on the aggregate-exposing step 3 mentioned above...
Thursday, May 13, 2010
Wednesday, May 12, 2010
Project Backyard: Update
The backyard is continuing it's transformation! The dry well has been installed, the dirt back filled and leveled, gravel put down, the curb removed for the new driveway and the previous driveway removed to make way for a new curb.
Here's a current snapshot of the back yard. A lot of work is being done this week so we'll have more updates soon!
Here's a current snapshot of the back yard. A lot of work is being done this week so we'll have more updates soon!
Guest Bathroom: Major Progress!
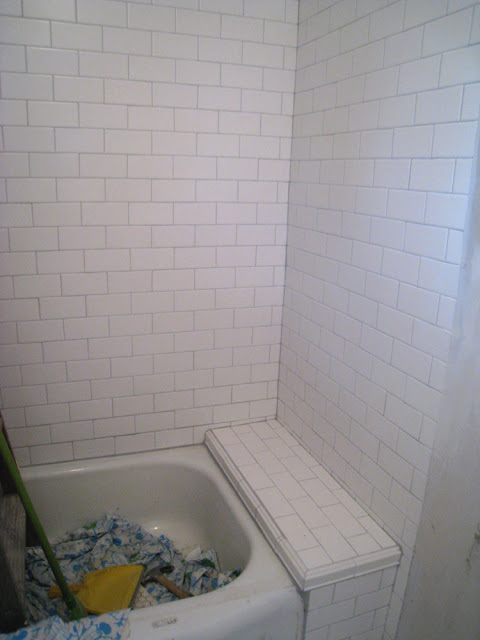
The guest bathroom renovation is moving right along. We're getting so close to the end we can taste it! The latest task to be completed was the tile work. 1" white hex tile was used for the floor and classic white subway tile was used for the shower enclosure and bench. We are really happy with the way it turned out!
Click here to see what the bathroom looked like when we started.
Click here to see what the bathroom looked like when we started.
Labels:
flooring,
floors,
guest bathroom,
hex tile,
shower,
subway tile,
tile,
tiling
Subscribe to:
Comments (Atom)


